Building an Astrology Web-App!
How I used Web-Scraping on Node.js to create an astrology Web-App on SvelteKit and Docker. Dealing with datetimes in Javascript and how I used date-fns to overcome them!
This project involves:
- Webscraping with Node.js (like BeautifulSoup in Python)
- Implementing a Server-Side JSON API to deliver scraped results
- Javascript Datetimes and alternatives (Using a library is worth it!)
- Using localStorage to persist preferences
- SvelteKit! (and Docker Deployment)
What we're building
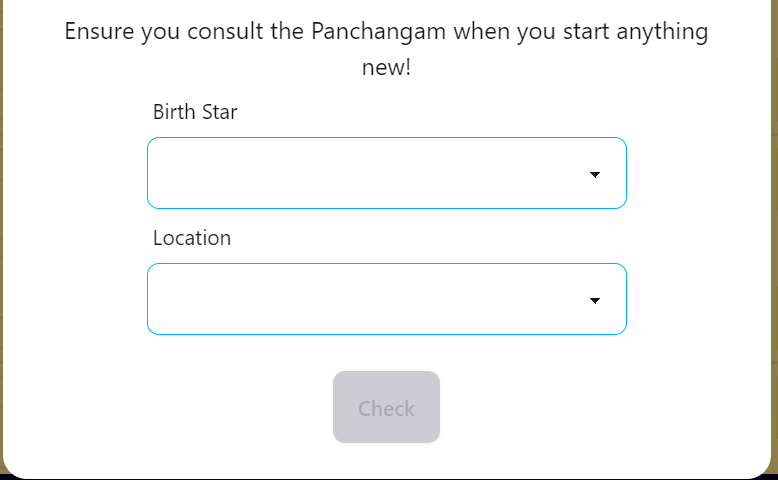
We're trying to automate the following process:
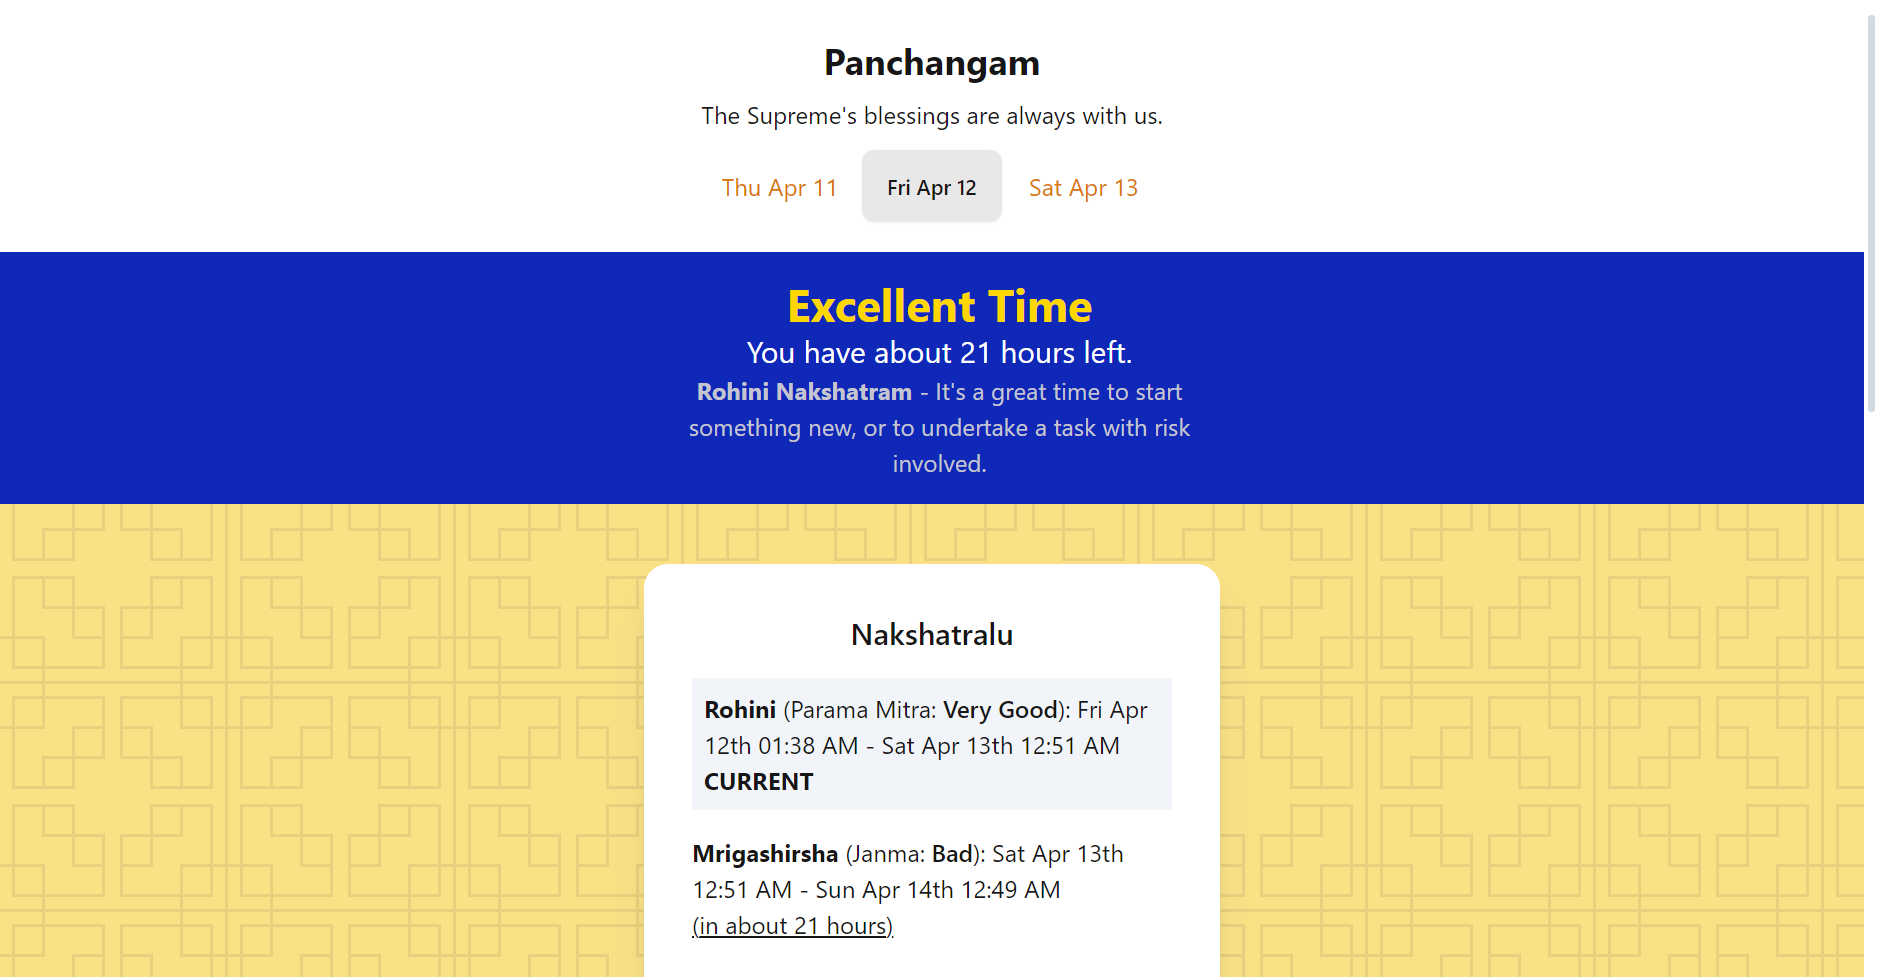
- Check panchangam.org to see the current star ('Nakshatram')
- Visit this blog post and refer to the following table:

After we derive a score by comparing the user's birth star to the current star, we can convert that score to a status:

It might look like a complicated process, but it's relatively straightforward. At most, it's tedious - Which is why we're going to automate it!
Step 1: Retrieving Data
We first need to retrieve 'Nakshatram' Data from this website, since it doesn't provide an API, we'll have to scrape what we need from the HTML.
This would ideally be done on the client, as web-scraping APIs are available. CORS and other browser restrictions hinder this - We either can't send the request, or read the HTML Response.
The solution I implemented was to expose a REST API on the Server, which made the request for us. In v1 of Panchangam (our web-app), the server would just proxy HTML Content to the client. I'd like to parse it on the server now though, so let's do that!
Some of you would be familiar with document.getElementById and other useful APIs available on the browser. None of these are present on Node.js, but there's jsdom to save the day!
In +server.js, let's
import jsdom from 'jsdom'

export async function GET(event) {
    let url = `...`

    let response = await fetch(url)
    let html = await response.text()

    const { JSDOM } = jsdom

    let dom = new JSDOM(html)
    var doc = dom.window.document

    let table_body = doc.getElementsByClassName("...")[0]

    let data = ...
    return new Response(JSON.stringify(data))
}
This file creates a REST API on the Server, this section of the docs covers API Routes.
Inside this API Route, we're first making a web request and then extracting the page's text - this is the HTML we want to scrape.
This is where we use jsdom for the first time! After exporting JSDOM, we can instantiate a new DOM Parser, this parser implements the same APIs as would be available browser-side. This means we can use document.getElementById and other fun methods again!
After copious amounts of string manipulation (in the source), we can finally return our parsed payload.
Step 2: Javascript Datetimes
This webapp is about astrology, so timing plays a big role. We want to inspect time ranges and see if the current time is present between a start and end date, we also want relative timestamps and easy formatting.
Javascript does not provide a simple API for the last two, the implemented Intl.RelativeTimeFormat is excellent but has its quirks. To address these issues, it looks like an external dependency is inevitable. A stackoverflow answer recommended date-fns.org, what an amazing recommendation!
After attempting to reimplementing the example on the front page, all my apprehension melted away. I installed date-fns (and recommend you do too!) and got to work.
Date Ranges
This one is pretty simple, and we don't need any external dependencies for it.
export function is_in_time_range(date, start_date, end_date) {
    let year = date.getFullYear()
    start_date.setFullYear(year)
    end_date.setFullYear(year)

    // Thanks https://johnkavanagh.co.uk/articles/check-if-today-is-between-two-dates-in-javascript/
    return date > start_date && date < end_date;
}
All our timings are going to be across the same year, and while Javascript's default new Date() instantiation greatly surpassed my expectations - it got the year wrong consistently. Let's convert the entire range to use one year. This method allows us to figure out which 'Nakshatram' to compare scores with. (The API returns multiple with time-ranges, it's on us to figure out which is applicable when.)
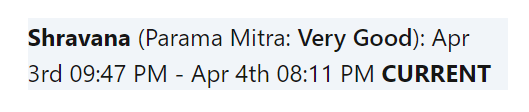
The 'CURRENT' tag is powered by this method.
Relative Timestamps
date-fns was super helpful! I just had to give it two dates, and it would spit out a string with the relative timestamp. Here are the docs for formatDistance.
let remaining_time = formatDistance(end_date, new Date())This feature powers the status banner on the frontpage!
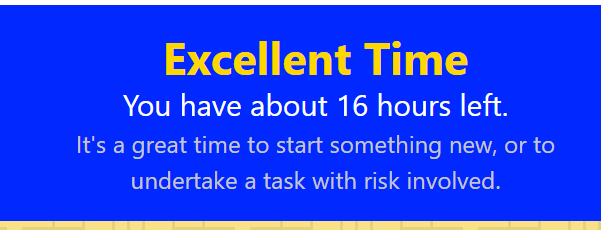
The about 16 hours is from date-fns. Love it.
Date Formatting
Now, this should be a standard in any language, especially coming from Python's strformat - this functionality was sorely missed. Luckily, date-fns has a format method for us that does its job very well.
format(end_date, 'MMM do hh:mm a')That ends up as
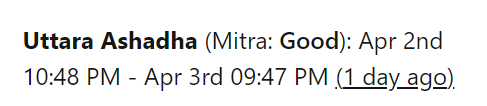
The relative timestamp was discussed above, the regular timestamps (Apr 2nd, ...) are from this function.
Date-fns saved me a lot of effort. Thanks!
Step 3: localStorage
Svelte Stores are a favourite feature, they allow for simple reactivity. Let the framework do the heavy lifting!
import { writable } from 'svelte/store'
let test = writable('')
Once imported, you can use the stores' special reactivity syntax in any .svelte file.
<h1>{$test}</h1>Will automatically update the <h1> any time test changes. This, again, saves us a lot of effort!
I was implementing localStorage alongside Svelte Stores when I stumbled upon joshnuss/svelte-persisted-store. This library looked perfect for our required, and was simply plug-n-play.
import { persisted } from 'svelte-persisted-store'

// First param `nakshatram` is the local storage key.
// Second param is the initial value.
export const nakshatram = persisted('nakshatram', '')
And nakshatram can be used like any other Svelte Store. This is how libraries should be, awesome!
When the User first visits our site, we collect some initial information. This information is persisted via localStorage and svelte-persisted-store. Now, the user can have a more seamless experience on subsequent visits. We remember them!
Step 4: SvelteKit & Docker Deployment
Since this project has a server involved, we'll have to stick to adapter-node (I normally use adapter-static).
As for Docker, here's the Dockerfile used in the project:
# Thanks https://gist.github.com/TheOnlyWayUp/f8733c272090e78e00b9891d2a709117

FROM node:20

WORKDIR /build
COPY src/package*.json .
RUN rm -rf node_modules
RUN rm -rf build
RUN npm install
COPY src/. .
RUN npm run build

EXPOSE 80
ENV PORT=80
ENV HOST=0.0.0.0

CMD [ "node", "build"]
We first copy over required files, install dependencies using npm, build the project (using npm), and run it using node!
I might know a thing or two about Docker, if you need some help, I'm available on Discord at TheOnlyWayUp. I like meeting people :)
And that's all! That's how I created an astrology web-app and the biggest hurdles I had to cross.
You can visit it here, the source code is available here. If you like what I'm doing, you can support me here!
Dhanush R.
TheOnlyWayUp.
Deployment Data
{
  "LiveURL": "https://panchangam.rambhat.la",
  "Repository": "https://github.com/TheOnlyWayUp/PanchangamLite"
}